Wednesday, November 26, 2014

Microwave Bowls

I have seen these around blog land for a couple of years now, but didn't really give them much thought, until my neighbor actually showed me one and shared with me how much they used theirs.  Then the other evening, I went to lift a glass bowl of heated liquid out of the microwave and almost dropped it because it was to hot to hold onto.

It was then I went looking for a pattern or tutorial on how to make a set.  I landed on this tutorial on Pinterest and dug into my stash to make a couple of cute bowls.  I found this chili ristras print to use in making the first two bowls.  I cut, quilted, darted and finished them in about an hour and a half.  Super easy, super cute, and super practical!


Warmest...

Tuesday, November 25, 2014

Making Christmas Progress

I am making a little progress every day.  I am so excited because I will have it all done by the fist or second week of December.  No stress of working right up to Christmas Day.

I finished the Dallas Cowboys quilt for one of my sons:


This is a close up of the quilt with the backing and the binding all done.


Here it is folded and ready to go into the matching pillow case to be used as the wrapping paper.


I used the same "piano blocks" for the top part of the pillow case, and one of the lighter colors for the middle band.


I know it is hard to see the quilting on the back of this quilt, but if you enlarge it you can see I traced the stars on the front middle panel.    I came out really nice and I think he will really enjoy it.  The size came out to be approximately 50" X 68".  A good size for a throw quilt.

Next up is a octagon tabletopper that I made for a neighbor of mine who has a couple of cats that she adores.  The center has all kinds of cats getting into Christmas mischief.  


This picture shows the backing I used, and I also used it for the binding, as I always like to do a diagonal type binding if I can.  I quilted it doing a straight line method of outlining the octagon shape spacing the lines about 3/4" apart going around continually.


I took some time out of sewing to get some canning done.  This last summer, my chickens were giving me about 9-10 eggs a day.  Way more than we can consume.  So I stacked up about 14 dozen in our spare refrigerator, to can at a later date.  Fresh eggs need to rest for quite a while, about 6 - 8 weeks, in order for them to peel without half of the white parts staying attached to the shell.  When canning eggs, they need to be perfect without any craters or cracks in the white part.  We canned them in a red chile flake and peppercorn brine this year, giving them the red color.  The men in my life eat them like candy.  Me, no, not so much.  


Warmest...


Sunday, November 23, 2014

Next Christmas Project

Yesterday, I spent most of the day working on this quilt for my other son for his Christmas present.  He is an insane avid fisherman.  He spends every spare minute either fishing, planning a fishing trip, or doing prep work for fishing (like tying flies).  He is such a die hard, that when he works on finding that "special hole", sometimes hiking in 5 miles just to do a little fishing.

I picked up this pattern and the fabric about 5 years ago, with the intent of making the quilt for him at some later date.  Well, this is the year that I have enough free time to do the quilts for both boys (30 year old twins).


This pattern is true to it's name, it takes 5 minutes to shop and 10 minutes to cut it out.  Layering the eleven fat quarters and cutting them from the diagram included in the pattern, really lets you get it cut out in 10 minutes.  Credit:  5 & Dime, by All Washed Up.  It looks as though her blog has been idle since 2011, but you can find this pattern all over the internet by just googling All Washed Up.

This is the focal point fabric, a Robert Kaufman "Wilderness Ridge".  It is a screen print, rather than a woven design or pattern. This is a close up of this fabric, which includes fishing poles, flies, lures, bobbers, etc:


Here is the completed top.  the smaller blocks cut from the eleven fat quarters includes prints with fish, river bed rocks, grass, woods, sunrise/sunset, sand, and other fishing gear. 


I chose this simple pattern, because he also, like his brother, like things simple.  So I will be doing some simple quilting on his as well.  Probably some straight line quilting from top to bottom about 4" apart.

Warmest...


Thursday, November 20, 2014

A Little More Christmas

I have three sons, and I have made a quilt for the oldest, when he joined the Army.  He has taken it wherever he has been stationed, even overseas on his deployments.  I have been meaning to get the quilts done for the other two boys (twins), but just keep getting side tracked.  I think it is because I feel I needed to have both done at the same time (it's a twin thing)  and the task was to daunting to get done, say for their birthday or Christmas.

I finally decided to tackle this goal of getting their quilts done for Christmas.  I can also share the progress of these quilts, as neither one of them ever read my blog.

So, this is the first one that I worked on the night before last and yesterday.  This is a wonderful pattern for a panel or focal print, as the center theme is surrounded by piano block strips and borders. That being said, it works up really fast, and looks great.

This son is an avid Dallas Cowboys fan, so I picked up the focal print a couple of years ago, and it happened to be a 60" wide cotton/poly mix and in a print I have not seen since.


The piano border blocks were a selection of nine prints and tone on tones.  Seven of the prints are batiks, and the other two are the tone on tone called "Rock Candy" by Blank.  The two light colored borders are also the "Rock Candy".  I picked the prints for this border, trying to pick ones that would fit color wise, but also had a star in the print.  This would tie it into the Dallas Cowboys logo of a star.


This is a close up of all the prints used in this quilt.  I finished the top early in the afternoon, and then paired it with the backing of a nice thick gray fleece.  I am not sandwiching in a batting for this quilt, as my Son doesn't like a heavy blanket, and using a thick fleece, it will be soft and warm for him without the weight.  He also is of the younger generation that is not to hip on the quilting part of my quilts, so I will be doing nothing but stitching in the ditch around the two light borders, and in between each piano piece.  I think in the middle focal point I will outline all the stars in the print.

Warmest...


Monday, November 17, 2014

It's Beginning to Look A Lot Like Christmas

This year, I am getting into the Christmas mood earlier than in the past.  Not sure why, but it is better than being Bah Humbugish?  Right?

Anyway, I hung up my Christmas Wreath wallhanging that I completed last week, on the corner wall in my office corner.


I have also been making wrapping paper for gifts on my list.  I started it last year, making pillow cases for the wrapping paper, because the cost of good wrapping paper is almost the same as fabric.  I now refuse to pay that much for paper when I can get fabric.  Just sayin'.  

Here is a peek for the kiddos gifts:


Quite awhile back, I posted about working on this quilt, and it went to my son's apartment, because his girlfriend gets colder that he does, and he wanted to know if I had a quilt I could send his way for her.  Now for Christmas, I want to get her a gift, so I dug out my scraps to the quilt and had enough to make two pillow cases.  


Another one checked off my list!!

Warmest...


Thursday, November 13, 2014

UFO Chocolate Legacy

This is a good lesson for having BOM's that have sat in the closet for several years before attempting to get them out and begin construction.  This one was ordered beginning January 2007.  I waited almost 8 years to begin sewing it together.  I have no recourse with the quilt shop who did this BOM, and now I have to work out all the problems that have arisen from this one.

I have mentioned in previous posts about working on this UFO.  It is a round robin kind of quilt, with each month receiving a set of blocks that are sewn around the first four center blocks.  So I am sewing along, getting to the third round of blocks, when I start putting the blocks in strips to sew around the first two rows, and lo and behold they don't fit!  They are off by 2 inches!   I know my cutting and stitching of blocks aren't perfect, but after all these years of doing this, they might be off no more than 1/8'.  I was so frustrated, so I went back and reread the third round blocks pattern, re-measured the pieces, and nothing.  Just by happenstance, I pulled out the future round of blocks patterns and instructions, to see how the quilt is going to proceed.  Guess what?  The instructions in month 5 states "Oops, we have been told by some astute quilter that we are off in our pattern by 2 inches, you have got to be kidding me.  And, get this, their solution to the error, is to "fill in" with scrappy sashing around the blocks and center piece to make the next round of blocks fit.  Really!!  Then I thought I had better look at the rest of the instructions and see what further issues there might be in this quilt.  And sure enough Month 8 has another problem, because the blocks for the rounds after making the first 2 inch adjustment are short by 2 inches, and again they suggest working in scrappy borders, sashing, or whatever clever ideas you as the quilter can come up with to make it fit.  This is just the major problems with this BOM, I won't bore you with the rest of the minor ones, as it then just sounds like whining on my part.

I think this quilt pattern was done on one of the many quilt software programs that are available out in computer land.  It looks good on paper, and surely one can trust computer math, right?  Not so, more often than not.  When I worked at a quilt shop, many quilts were designed on such software, and the shop had to deal with many errors along the construction of the quilt.  Anyway, that's the end of my ranting, here is what I am doing on completing this top.

So, I tore out the quilt down to the first four blocks that are sewn together, and added a small scrappy border, and then added then second round.


At this point, it didn't give me the additional 2 inches needed for round three, so I added some more scrappy borders.  Up close, it looks pretty tacky.  But I kept going, only because I have three rounds of blocks already done.


After days of frustration, and adjusting I have the quilt top to this point.  This has three rounds of blocks with two scrappy 2 1/2 inch borders.  There is one around the first four blocks and around the third round of blocks.  These scrappy borders are planned in the original pattern, but I also still had to add some scrappy 1 inch sashings here and there to get it to this point of construction.  Now, at this point in the construction, all the adjustments don't look so tacky.  I would also imagine that after getting it quilted, it will look even less tacky.  We can only hope!!!


The fourth round of blocks are blocks called the Churn Dash.  I will be making 40 of them.  It will be awhile before I can get the next round done.  


Yes, this will take some time to complete, as I have some Christmas sewing to accomplish the next few weeks.  So, in reality, this project will be once again put on the back burner until after the first of the year.

Warmest...

Monday, November 3, 2014

UFO Wallhanging Done

I managed to complete the quilting and binding on the Christmas Wreath wallhanging in the last couple of days.  I did post earlier on how I was going to quilt this one, but it didn't quite work out that way.  I was planning to do some large and small stippling, but the machines where not cooperating (mainly due to the multiple pieced backing)!  So I ended up just doing some very simple straight line quilting.  I am going to show you the finished pictures, and then I am going to talk about "quilting the quilt".

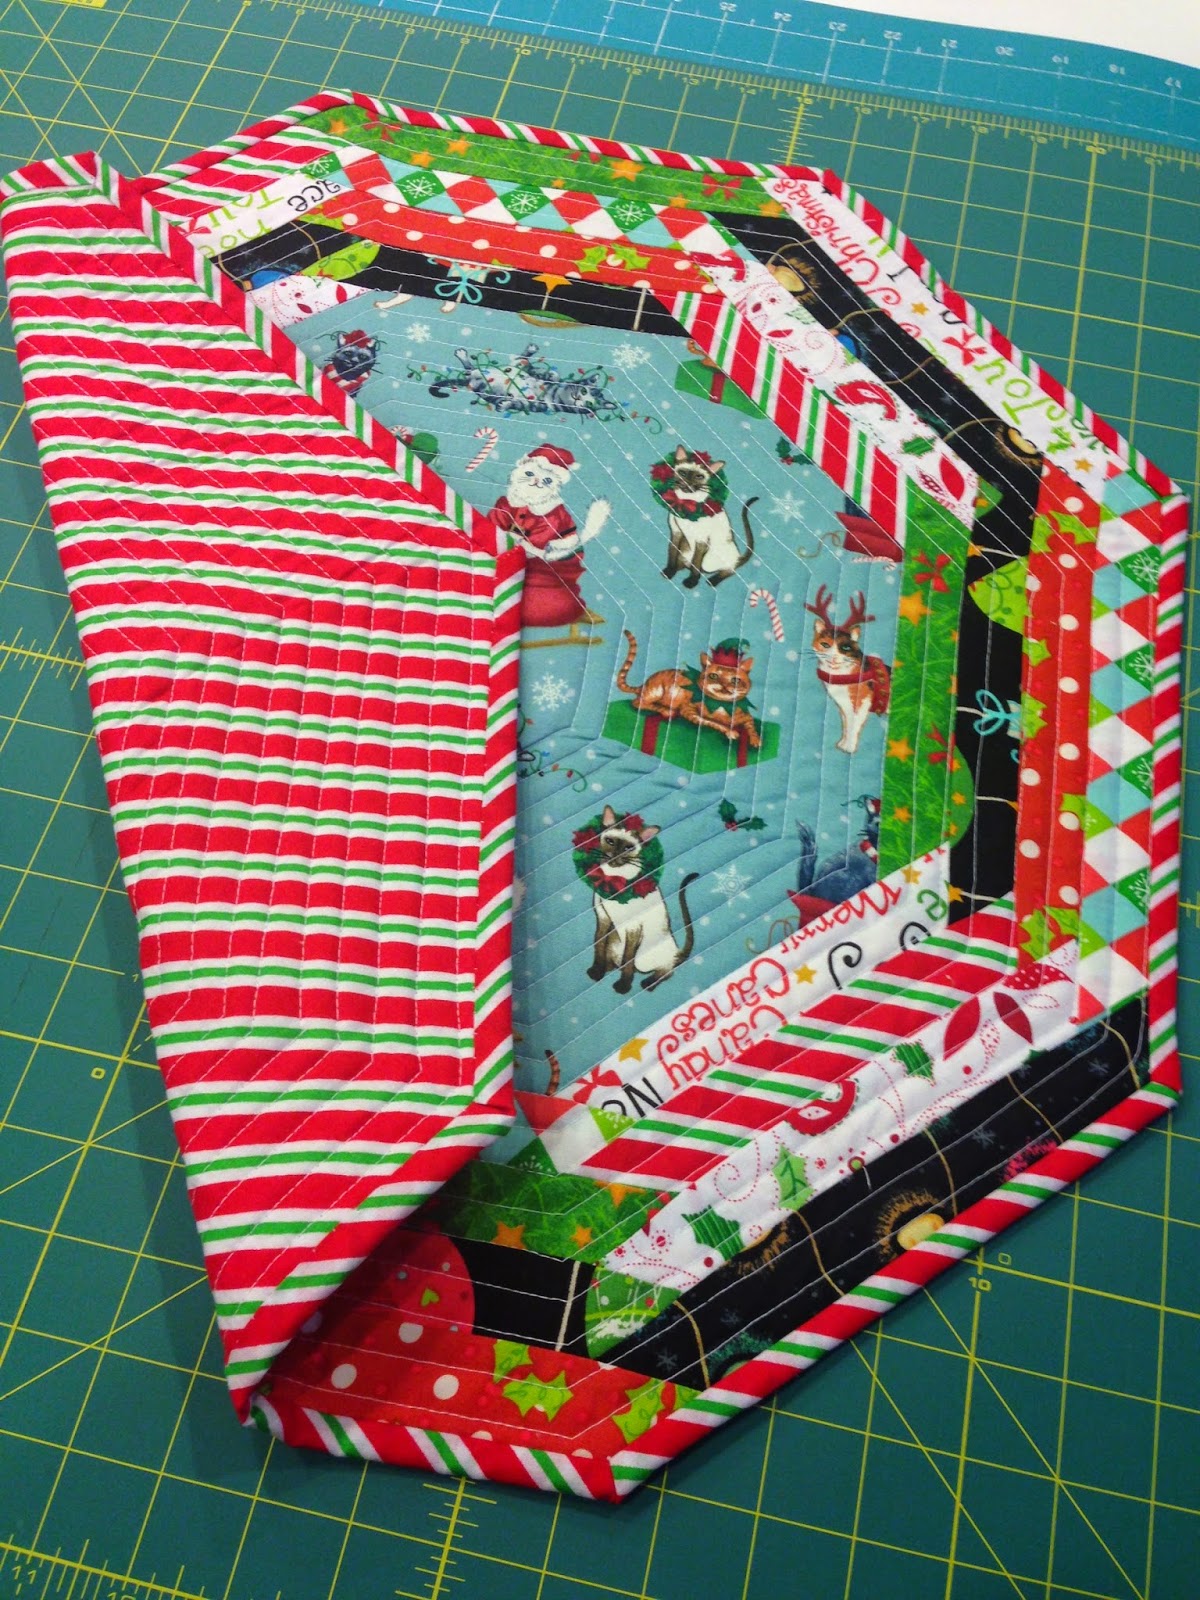
Here is the finished wallhanging.  I will be hanging in in my little office area (actually it is a corner in my living room) over the holidays.  I am actually thinking of taking a red permanent marker and writing "Merry Christmas" in the center of the wreath, but as I am looking at it now in the picture, I might just leave it empty.

This is a close up to a corner showing the simple straight stitching I did in each inside corner.


If you enlarge the picture, you can see I "X'd" through all the green part of the wreath, and I did just an inside shadowing on the red ribbon part.


The border corners, I just kept stitching from the borders out to the square, and then I just stitched from corner to corner one time to do a different look for these outside corners.


The project kits that came form the Main Street Cotton Shop always included more fabric than actually needed to complete the project, so this time I stitched up all the pieces into a very scrappy backing.  Most other times, I just put the extra fabric in a scrap basket for use later.


When I looked at the blank canvas of the wallhanging top, I pulled out the book that had the pattern in it to see how it was quilted. As you can see, the quilting is quite exquisite, and very beautiful.  It looked so perfect, I almost put the project away agin, because I felt, there was no way I could make mine look even close to this one.  But, I am determined to complete the very long list of UFO's, and went ahead and quilted it, and feel okay about the finished project.


All of us can make the blocks, complete the tops, but fall short in completing the project because we come up short when it comes to doing the quilting.  Quilters tend to be perfectionists and because of that, we tend not do do the quilting.  It is the hardest part of the process, and most of us don't have a long arm machine to make this part easier.  

I have spent hours on the internet, pouring over books and magazines, and standing in awe at the samples at local quilt shops at the amazing quilting done on an array of pieces.  They are truly pieces of art, done by true artists.  Not everyone can be a true artist, most people just paint.  

Quilters that are true artists have set the bar so high for most quilters, that we don't even try because we know that our work will not measure up to what we see on average.  And by not even trying, we loose out on the joy of completing projects, and accepting our work as our own and being able to use what we make. 

It has taken me a long time to feel comfortable with my work.  I am the first to admit, it is not even close to perfect!  I realized this last year, that I don't want to compete in State Fairs, I don't need to win a ribbon at a quilt guild, and I am not trying to make a living on my quilting.  I also realized that I don't want something so perfect that it looks like it was manufactured in a factory.  Looking in the the history of quilting, none of those quilts were perfect, nor were they so intricately quilted as they are today.  I was originally drawn to quilting because I like the simple pioneer way of life, and I want my quilts to reflect that draw.  

My suggestion to all and any of you who are hesitant to quilt, go for it.  Get some projects done.  You will be thrilled you did.  It is easiest to start small, like a wallhanging or a table runner.  But if you want to start bigger,  try one of your first quilt tops that might have a few errors in construction and practice.  Then when done, you can use it for a picnic quilt, or a camp trailer quilt, or in a spare room.  Be like the Nike motto, "Just Do It!"

Here is a couple of completes that might help you get started:

This was one of my first local quilt shop Saturday Samplers that I did, and quilted.  I sleep under it every night, keeps me warm, and makes me very happy.  Every time I wash the bed and put on this quilt, I run my hand over the top and smile.  I just love to feel quilting.


The next two pictures show a close up of a couple of blocks and how I chose to quilt not only the blocks but the sashing.


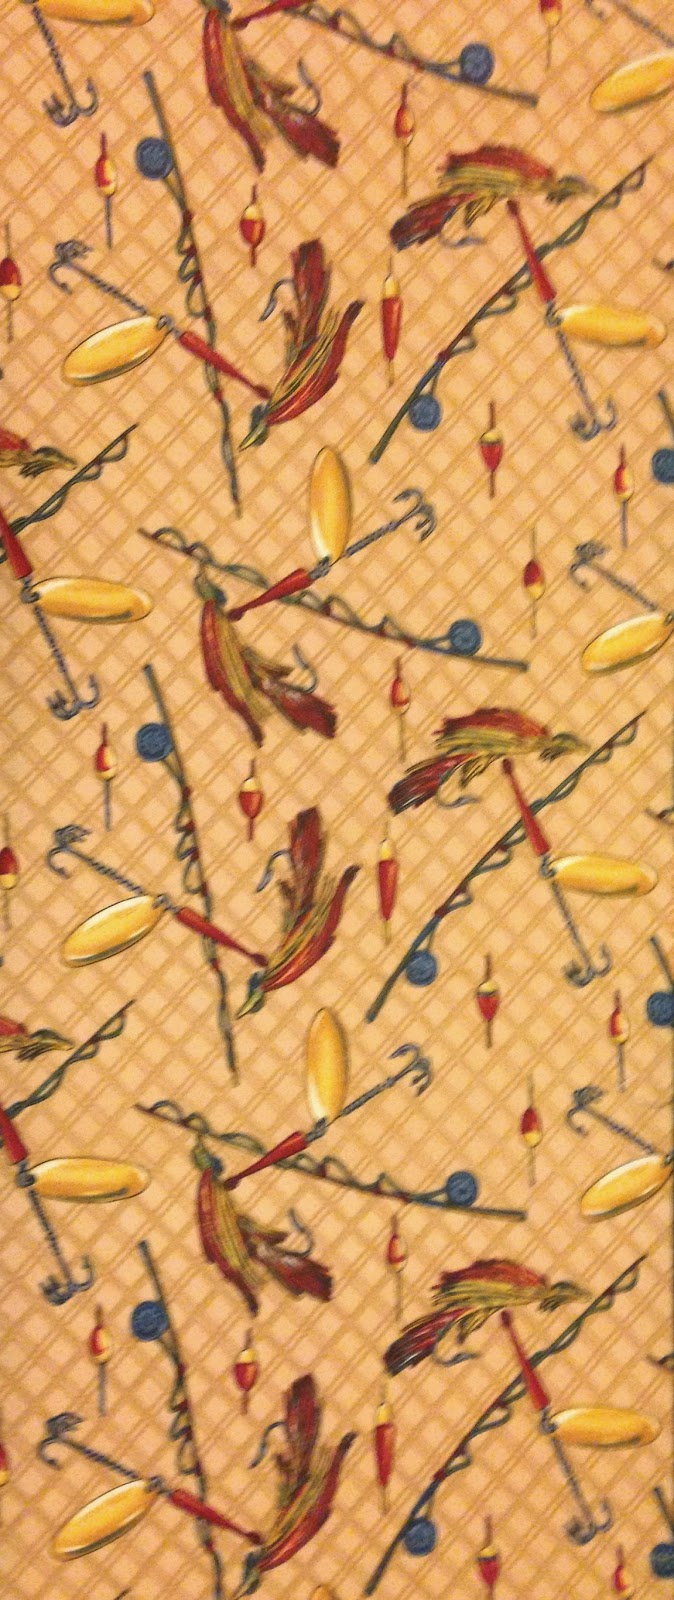
This is the backing, and yes it is fabric that was 108" wide, so it made it easier to quilt.  Not like the wreath wallhanging above, the pieced backing makes it harder to stitch because of all the seams that the pressure foot has to move over.  That was the main reason stippling didn't work.


The most outer border has cross hatching.


This print has stars in it's pattern, so I drew out some stars and quilted them throughout the borders.  Large on the bigger border and smaller on the inner smaller border.


I hope this help you think of ways to do some quilting on your projects.  Remember "Just Do Some Quilting".

Warmest...